Tag Archives: red worm farming tips

DIY Worm Chow

12 Oct

Worms will eat just about anything they can fit into their tiny mouth, and are the ultimate composter, humus maker, and soil conditioner.  The primary feedstock I feed my worms is composted horse and cow manure, yard clippings-leaves, and table scraps (minus dairy and grease).  Between feedings I sprinkle my own version of Worm Chow over the top of the bin.  This simple recipe is great for fattening up your worms for a fishing trip or just adding some diversity to their diet and your castings.  Use for your Alabama Jumpers, Red Worms, European Nightcrawlers, or African Nightcrawlers.

TexasRedWorms.com Worm Chow is:

1 part corn meal

1 part ground up oatmeal

add crushed egg shells for minerals and flavor

Nightcrawlers vs. Red Worms: Summer Performance

12 Aug

I have spent the last couple of weekends harvesting castings from my red worm bins and european nightcrawler bins.  I had tried to hold out until after Labor Day, when it’s only 95 outside.  The heat can add stress to harvesting castings for you and the worms.  Exposed worms can dry out and die quickly.

Loaded down with finished worm castings I was left with little choice.  The girls pitched in and really helped speed things.  My harvester that was built last winter, really came in handy.  We were able to crank through 100+ pounds in no time.  The girls picked worms stuck in the harvester screen. On a side note: Use cooking spray on the wire mesh to help keep the worms from sticking.

In picking egg capsules and smaller worms from two separate harvest runs (red worms/ european nightcrawlers),  I was surprised at the performance of the nightcrawlers.  The cocoon or egg capsule production has definitely slowed down for the red worms compared to other times of the year.  Compared to the red worms, the nightcrawlers had about triple the amount of eggs.  That’s right, from what I have seen this Summer, the European Nightcrawlers have outperformed red wigglers in reproduction.

This past Winter and Summer have been the most extreme temperatures I have seen since beginning worm farming.  The good news is that with a little planning and preparation worms can flourish in just about any part of the country.

Francisco’s Worm Farm

5 Aug

Francisco was kind enough to share these pics of his double tub worm bin.  Francisco got started a few months ago and is doing great.  His double bin construction technique allows for excess moisture to drain into the bottom catch tub (worm leachate).   His bedding base is comprised of finely shredded newspaper mixed w/ food waste.  As a mulch layer, he keeps a few sheets of wet newspaper on top of the bin.  Francisco also shared some of his homemade worm chow that my worms loved.  It was gone the next morning.

Thanks for sharing your ideas and pictures.

Protecting your worms from the Summer heat.

5 Aug

This Summer has been brutal, and can be very stressful to your worm bins and beds.  Redworms perform best in temperature ranging from 40 F – 80 F., and keeping them moist is essential to their survival in these less than ideal conditions. Don’t drown your worms, but  error on the side of wet in this blistering heat.

I posted earlier, how to keep worm bins cool by adding frozen water bottles.  This works great, but w/ temps hitting 100 in the shade this week, I began having to use more and more ice bottles.  I was running out of freezer spa, and was able to convince my wife to let me bring my smaller bins indoors.

My larger worm bins kept in full shade, have faired well.  Size of the bin is a big factor.  Larger bins or containers will naturally have more volume to allow for greater insulation and protection from extreme temperatures.  Smaller bins will “feel the heat” and not have as much buffer or room for protection.  I keep old rugs on top of the bedding that are sprayed down daily to keep moist and cool.  Add a few more inches of mulch to in ground worm beds and keep as moist as possible in these tough conditions. The mulch added to worm beds or flower beds will add organic matter, protection, and an additional moisture barrier.

RedWorm Composting: Thanks for your participation this past weekend.

25 Jul

Thank you to all who came out to the San Antonio Botanical Garden this weekend.  I have included some links and attachments to dig a little deeper into some of the topics we covered on Saturday.
Worm Handout pdf

Links:

Care of worms– what to do when you get your worms.

Harnessing the Earthworm – by Thomas J. Barrett

Adding worms to your raised bed 

• In ground bin

Harvesting Worm Castings- My harvester

Compost Tea

Thanks again to all who participated and to Sasha Kodet and the San Antonio Botanical Garden.  Let me know if you have any questions, or if I can give you some feedback on your set up.

KyleHarrell@hotmail.com
210-310-5046
http://www.TexasRedWorms.com

Composting with Red Worms 10:00am this Saturday at the San Antonio Botanical Garden

20 Jul

Join TexasRedWorms.com at the San Antonio Botanical Garden this Saturday, July 23 at 10:00 am.  We will be teaching how to set up your own red worm composting bin, and how to compost with worms.  Learn how to turn your kitchen waste into rich worm castings that will condition the soil, and fertilize your plants naturally.

Composting with Red Worms

 10 am—noon. Start turning your waste into rich worm castings for your garden and plants. Red Worm composting from
TexasRedWorms.com will show you how to make your own worm bed and bin, how to feed, care for, and harvest your own steady supply of worm castings. Limit 30 participants. Fee: $20. To register, please contact Sasha Kodet at 210.207.3270 or sasha.kodet@sanantonio.gov.

Worm farming. Fun for the whole family.

27 May
 Thanks to Bryan in San Antonio for keeping us posted with all the cool worm composting projects he and his family have going.  
From Bryan:
     I wanted to up date you on how things are going with my worms. The worm tube in my planter seems to be functioning although managing the moisture level needs a bit more attention then I had expected. The high watering needs of the plants dictates that no extra moisture can be added to the tube, at lest for now. Like you said, you have to experiment. As you can see in the picture I had sent you earlier, I had placed a piece of panty hose over the top to keep out flies and other insects. A small number of gnats and ants have managed to get in. The worms in the tube are thriving and multiplying so that’s a good sign. Taking your advice of dividing the worms has helped to continue their rate of reproduction so much in that we have started our third bin two days ago, and probably have enough to start two more. We are all having a fun time of it.
    Soon after starting the first bin I decided to place two worms in a potted pineapple head that I had started. The soil in the pot had become hard and I wanted to see if adding some worms would help, and also if the worms would survive. After a little over a month, the soil is soft and the plants growth has accelerated and the new leafs look great. As of yesterday, we have started brewing worm tea in the typical fashion, 5 gal bucket, aquarium pump and aeration stones and molasses.
  The collecting of coffee grounds from Starbucks has begun, so far I have filled a new 30 gal trash can that I purchased at Wal Mart for around $10.00  about half way. We are also saving our egg shells as well as collecting them from a local bakery.  We use a blender, small food processor, and a mortar to grind them to a fine powder allowing for almost instant availability to the worms. I guess I’ve crossed over the sanity line somewhere.   I do have one question you might be able to answer?  Question* If compost worms i.e. red wigglers were thriving in a plant, flower or vegetable bed would they at some point start eating the roots of the plants?
     Looking forward to hearing from you soon your friend.
                                                                                           BRIAN
Wow.  You are a worm farming machine.  That is outstanding work.
 
I have some worms in some potted plants, as well.  There is a chance they could eat some of the roots.  Just keep adding organic matter so the worms will have plenty to eat.  Keep an eye on the plants health, and thin out the worms from time to time.  I think that kept in check the plants will benefit more from the worm castings than harm can be done.
Thanks for the update,
Kyle

Worms doing well in Houston heat

24 May

From Mark

My worms seem to be thriving now. Have dozens of them in every handful of compost. How quickly will they reproduce? How long before my population outgrows my 20 gallon plastic container? They are in my garage and it is getting a little warm, so I put a frozen gallon of water in it every day to keep temp in high 60s. They seem to like it. I keep one jug in freezer and one in bin and rotate every day. I am ready to harvest my first batch of compost in a few weeks. Mark.

Great to hear.  Excellent idea with the frozen water bottle.

Your worms should double in # in @ 90 days.  You can start a new bin at any time.  While harvesting castings is a good time to take inventory, see how they are doing, and start a new bin.  You can get another 20 gallon container or multiple 5-10 gallon ones.  Now the fun begins, watching your worms multiply and produce castings. 

Thanks for the update. 

Kyle
http://www.TexasRedWorms.com


Help. I’m losing my worms.

21 May

Below is a question I received via email, and thought I would share it.

Question from reader:

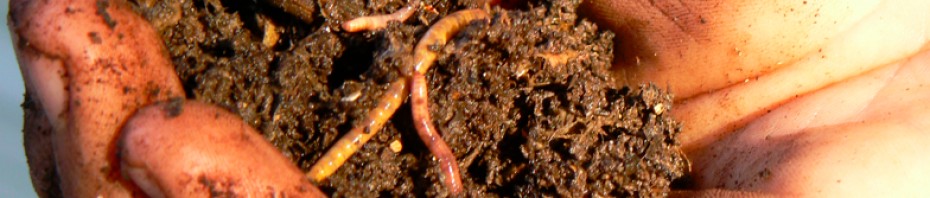
I have a problem with my worms and was wondering if you can help. I recently purchased a worm composter manufactured by Tumbleweed called Can-O-Worms. It has two working trays that have holes in them to allow worms to migrate upwards and also allows liquid to filter down into a collector tray. I have discovered that a lot of my red worms are dropping down into the collector tray and then dying. I also am finding several worms dying in the working tray (their bodies look as though they have been pinched). Have you ever heard of this? Is this a design flaw of my composter? I am very interested in worm composting and would welcome your advice.

TexasRedWorms.com :

I’m happy to try and help. You only have a problem if you are losing more than a few.  It’s normal to lose a four or five every once in awhile, in the bottom tray. You’ll usually have a few curious worms, and they are highly sensitive to barometric pressure.

The pinching is not something I’m familiar with. The only predators are centipedes and moles. If you do suspect a predator, diatomaceous earth can be added to your bedding. This is safe for you and the worms but will kill insects and Arthropoda. You can find it in most garden sections, be sure and stay away from pool grade. The pool grade is too fine and can be ingested and can be dangerous. If your losses are more than a few, I might need some more info. What, how much, and how often are you feeding? Temp of bin? Is it too wet? What other critters do you see in your bin?

 From reader: Thanks for your rapid response. After reading your email I immediately went out and cleaned the collector tray. I counted about 18 dead worms. Today (two days later) I only found 2 dead and one alive. I was pleasantly surprised with the few numbers. Maybe things are stabilizing. I’ll keep you updated. I can only assume that the pinching I talked about is caused by the worm trying to squeeze through a hole much smaller than it can manage.  I have found worms pinched in half on the surface with guts exposed and bleeding.  At one point I was wondering if maybe I caused these injuries by scratching the surface to see how the worms were doing. Are they so delicate that I should not be probing the bed? Maybe these last couple of days by leaving them alone is the result of the few casualties. But then I wonder how is it possible for your worms to survive the tumbling action of your worm harvester? As for centipedes, I don’t know. I haven’t seen any. I started this worm composter about two weeks ago.  So far I have only fed the worms the original coir bedding, lettuce, banana peels and coffee grounds.   Today at 3:00 PM the temperature of the bed is 70F. The instructions of the bin calls for flushing the bed once a week with a pail of water. Since the water freely drains into the collector tray I didn’t think things could get too wet. What is too wet? Thanks again for all your input,

TexasRedWorms.com :

Good, those numbers are more like it. 2 rather than 18.

The worms should not be pinching themselves trying to squeeze, and are
not going to get killed by you scratching the surface. The only thing
I can think of on the pinching front, is if you might by accident be
clipping them with the tray? They can also be gripping when the tray
is pulled off and be getting pulled apart. I am pretty gentle when
pulling them out of the screen. They wrap up and coil to hang on, I
will have to unwrap them sometimes because they will hold on tight.

The weekly flush I’m not familiar with? Why do they want you to flush
it? The flush could have sent some of the 18 worms to a watery grave.

Holes can get stopped up with castings, real wet bins get real fudgy.
Too wet will clog drainage holes and make harvesting more difficult.

Hang in there, we’ll get you rolling, and it will be a breeze.

DIY Worm Trough

28 Apr

I had been thinking of building a feed trough style worm bed for some time.  I found some plastic 55 gallon drums on Craigslist.  My dad had some pine 2X4s cut from his saw mill, and we were in business.  We began by cutting the 55 gallon plastic drums in half w/ a skill saw.

Materials: (2X4s, plastic 55 gallon drums, 3 inch wood screws, roofing screws, Thompson’s water seal)

Next we cut the 2X4s to border the open 1/2 end of the drum.  We used 3″ screws to piece the wood together, and galvanized roofing screws to secure the barrel to frame.  The height off the ground, we sized to about waist high for ease of use and for clearance underneath.
We had enough time and materials to build 3 bins.  When finished, I sprayed some wood preservative on the untreated pine, then I added compost and worms.  These bins are kept in a shaded area, and covered with plastic lids.  I set up a bin for each species we raise (Alabama Jumpers, Red Worms, European Nightcrawlers)
Thanks to my dad (pictured) for the pine, and skilled labor.