Below is a picture from a customer who asked the question, “What are these in my bin and are they harmful to the worms”? These are probably black soldier fly larvae. They are a little unsightly, but are good composters in their own right and are not harmful to your worms. These tend to show up in my manure piles when the weather heats up. I will remove them most of the time from my worm bin if they show up, but it is not necessary.
Flow Through Worm Bin 2
27 Feb
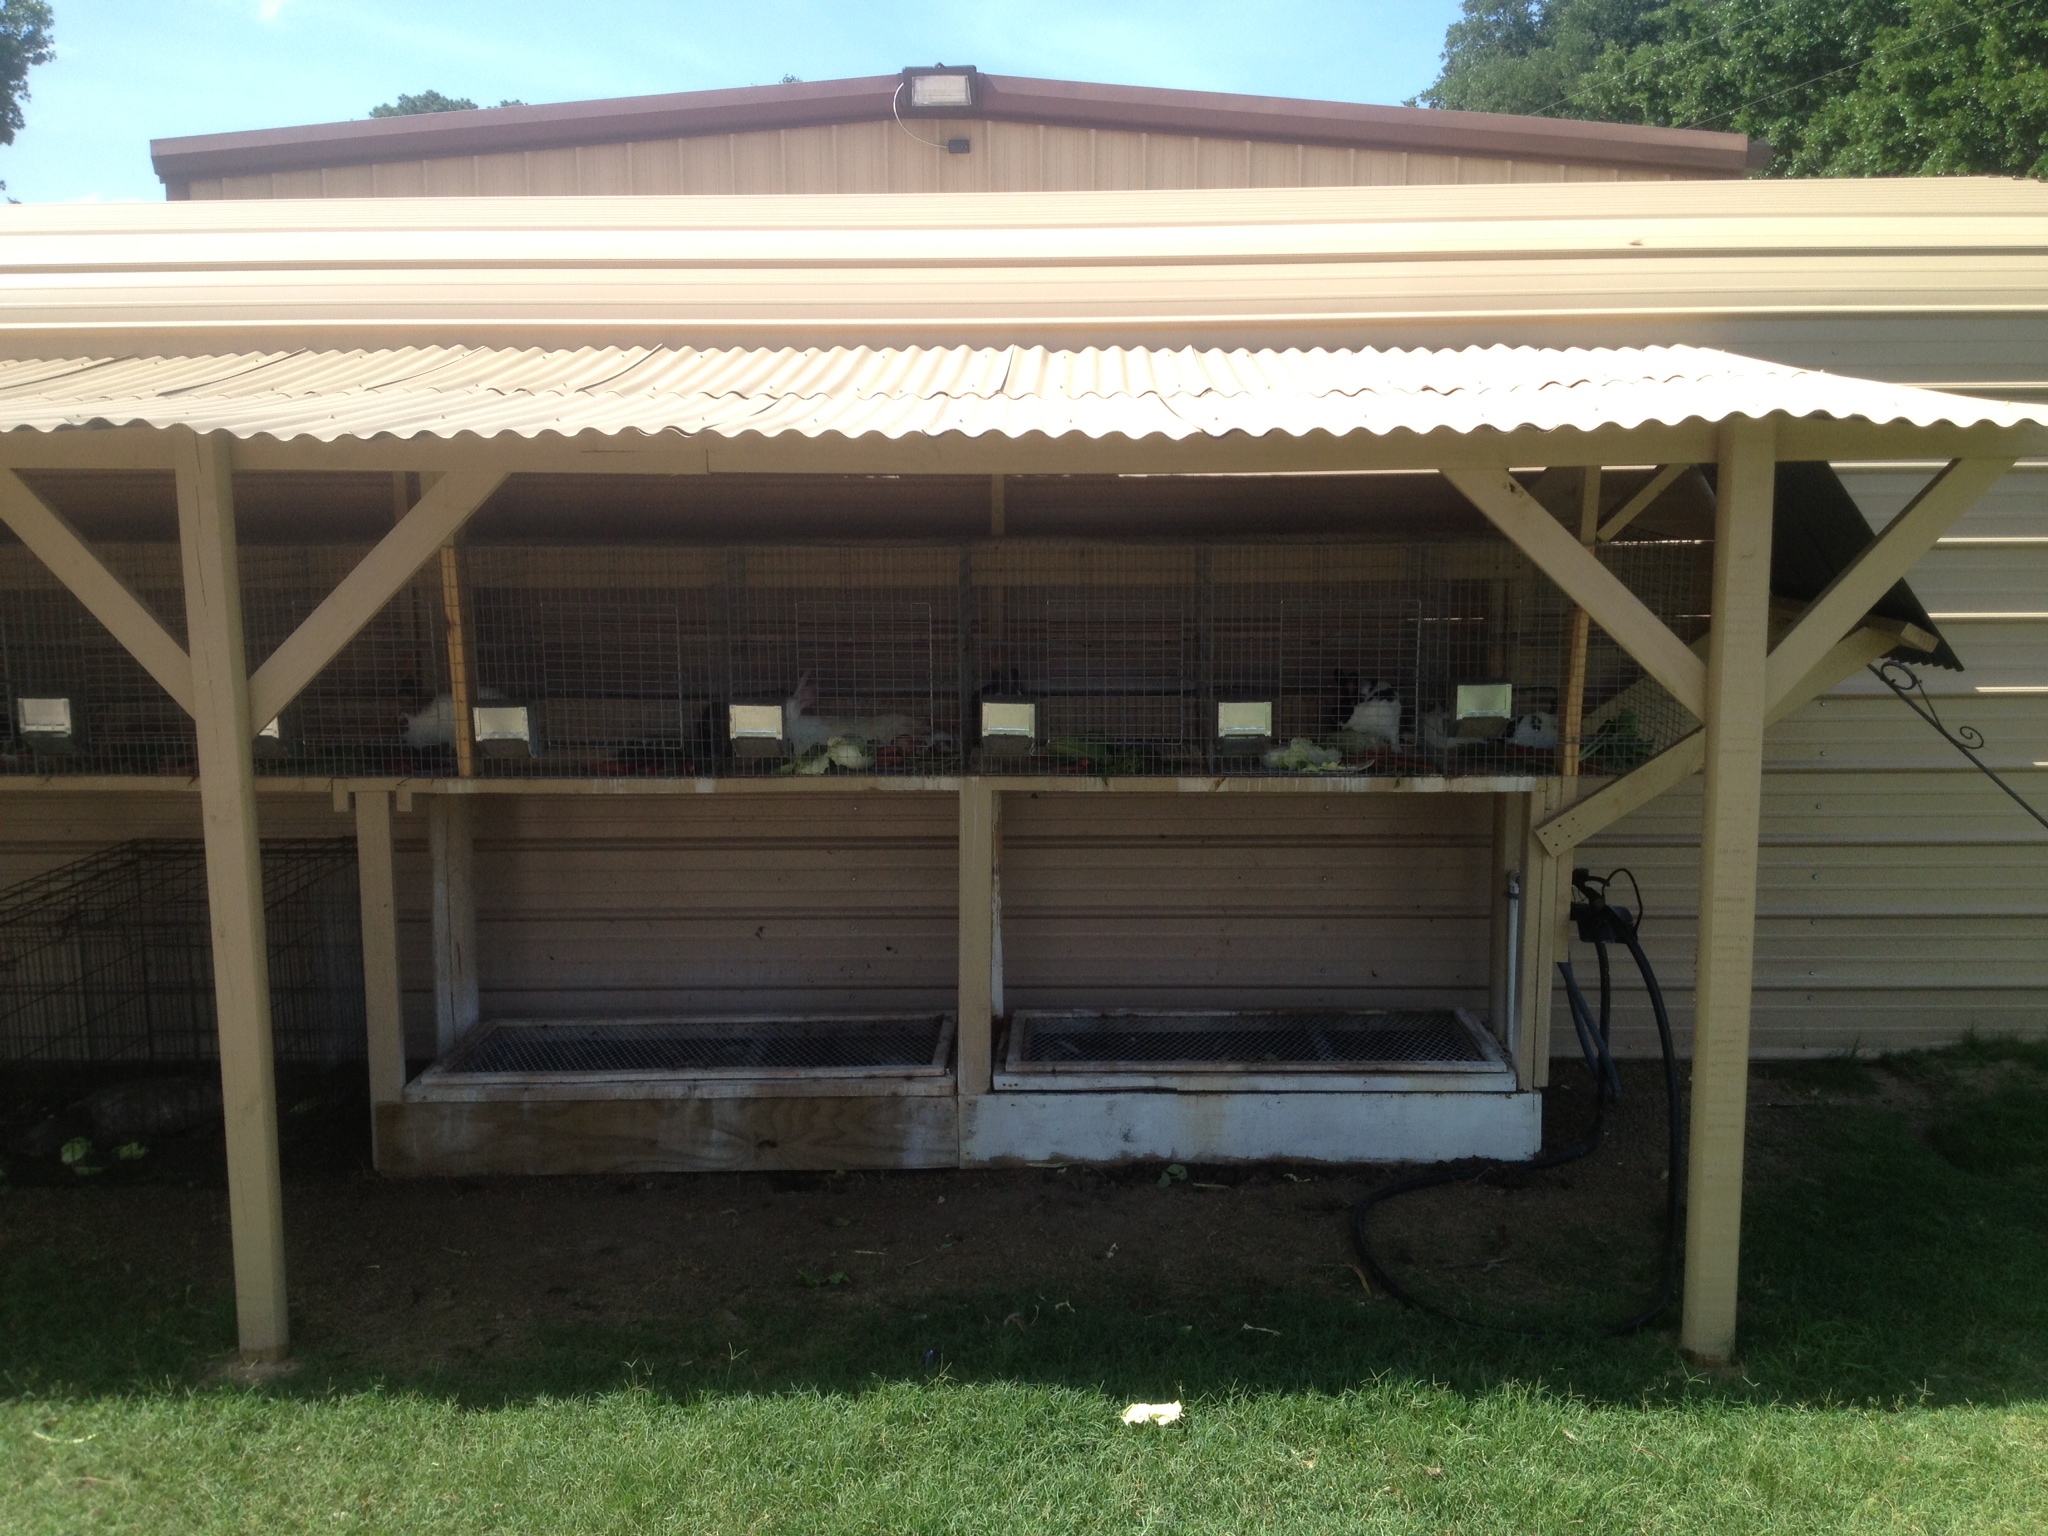
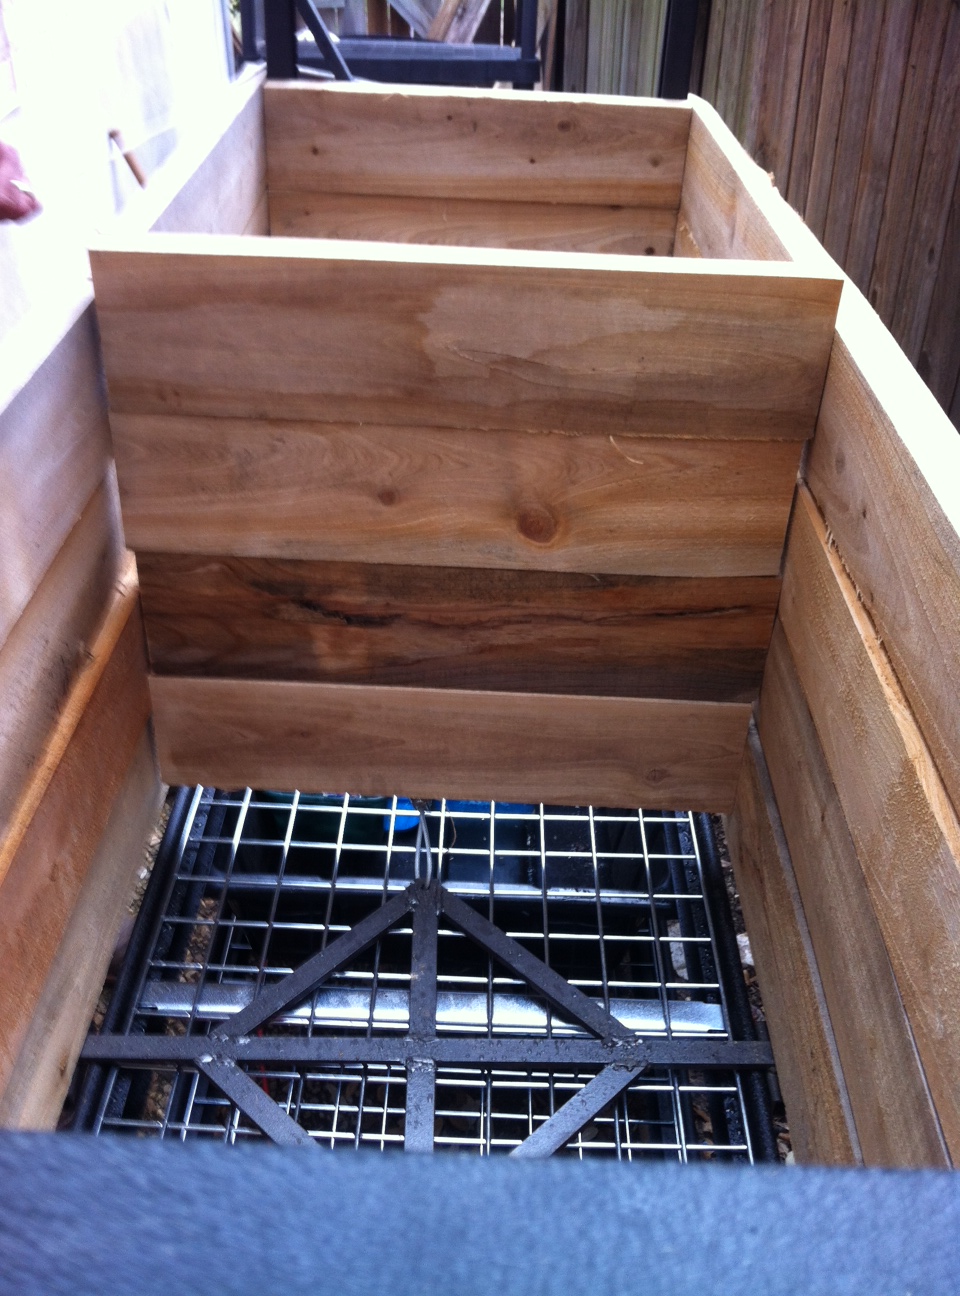
In production since last week this TexasRedWorm Flow Through 2 has been a work in progress for several years. I have been looking at examples of flow through bins homemade and commercially available for some time. This latest design is the latest version predated by several prototypes. This latest evolution has been a success thus far. I ended up purchasing the metal racks from Costco for about $137. Easy to assemble and very sturdy, these were a great buy at a good price. I spent about $70 on hardware (nuts, bolts, screws, washers, 20′ of .25″ cable, and cable clamps). Key to a long lasting box built around the metal rack, were cypress 2×6’s from TexasDozer.com cut from my dad’s saw mill. Cypress will not rot and in it’s natural state (no chemicals used to preserve the wood) and will not leach out anything harmful to the worms or castings.
The cutting diamond bar was fabricated out of scrap and square tubing for the guides. This will be pulled with winches mounted to both sides of the rack to cut and harvest castings from the bin.
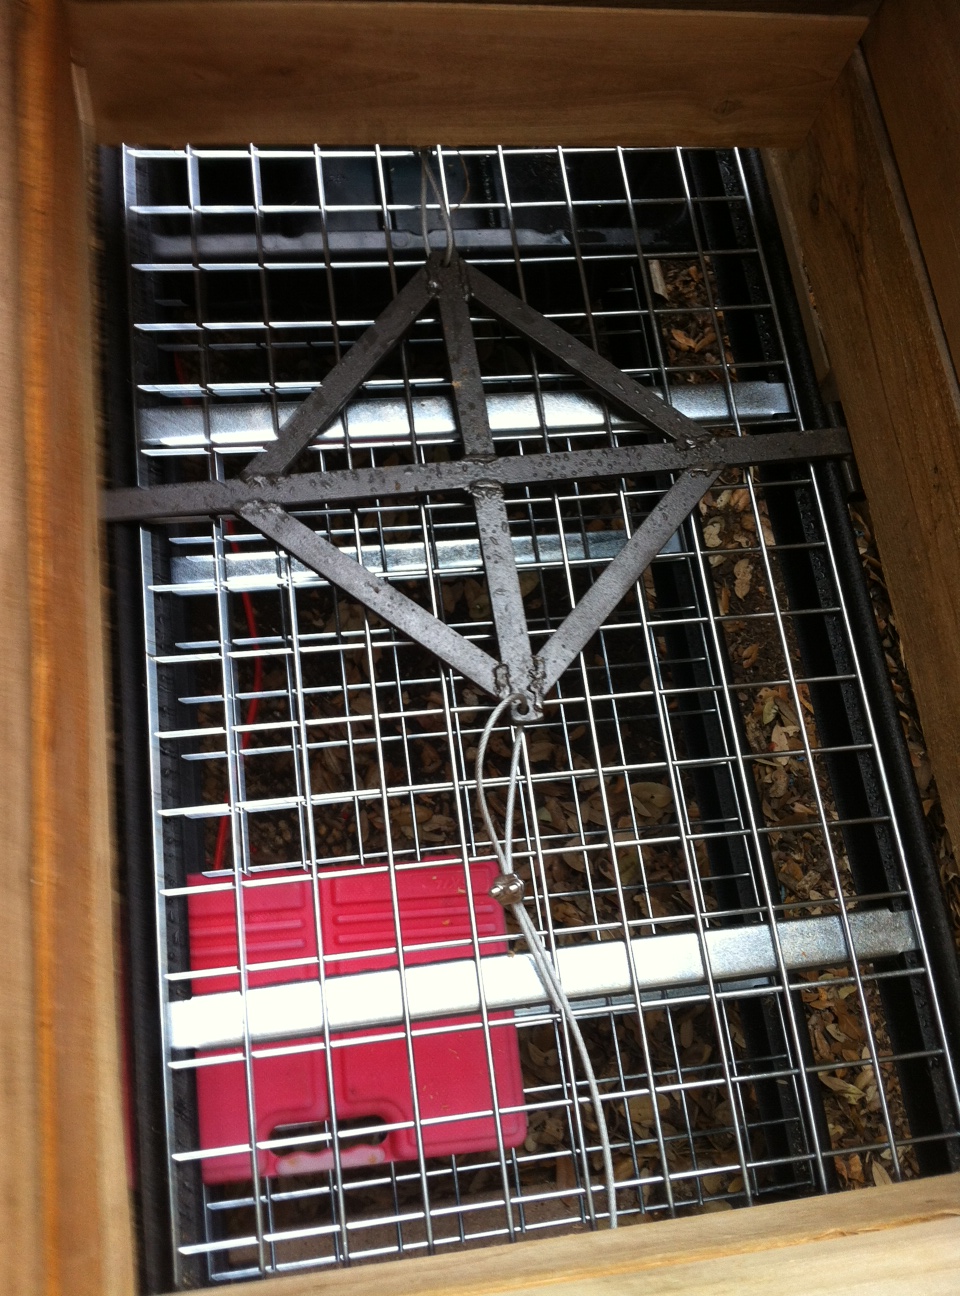
Two mason tubs purchased at Lowe’s for around $13 each rest on the bottom rack just below the flow through bin to catch castings. The bottom of the bin was lined with newspaper and worms and compost were added. We will let the worms go to work for several weeks feeding compost as needed. Over the next few weeks the newspaper will break down and the bin will be ready to harvest. For the initial harvest, remove by hand the newspaper from under the screen. Use the winch from one side to move the cutting bar across the bottom of the bin one time.
State Master Gardener Composter-Specialist Training June 13 at the San Antonio Botanical Garden
13 JunWorms are for more than just fishing. I’ll be at The San Antonio Botanical Garden tomorrow to discuss composting with worms. We’ll be talking about how worms can take kitchen waste from the trash can to the garden and add life to your soil and plants. Soon you’ll be backing up your pickup to scavenge manure piles and livestock stalls to feed your own brood of humus producers, and you’ll be producing some of the finest vegetables and plants around.
Flow Through Worm Bin part 1
22 MarI have tried several models of flow through systems and continue to tinker to get the results I’m looking for. The idea is for the finished castings to fall through the grate at the bottom of the bin and the worms to work towards the top of the bin.
Materials: square metal tubing, plywood, braided cable, 1.5″ self tapping metal screws, small I beam we found for the base bar to mount winches, and 2 winches (one we salvaged and another from Tractor Supply @$20) for pulling each direction.
We welded a bar to slide along the bottom of the bin to agitate the castings through the grate. I have tried other versions without the cutting bar, and castings tend to get clumpy and stuck. Stay tuned for the big reveal when we add worms and a few finishing touches.
Protecting your worms from the Summer heat.
5 AugThis Summer has been brutal, and can be very stressful to your worm bins and beds. Redworms perform best in temperature ranging from 40 F – 80 F., and keeping them moist is essential to their survival in these less than ideal conditions. Don’t drown your worms, but error on the side of wet in this blistering heat.
I posted earlier, how to keep worm bins cool by adding frozen water bottles. This works great, but w/ temps hitting 100 in the shade this week, I began having to use more and more ice bottles. I was running out of freezer spa, and was able to convince my wife to let me bring my smaller bins indoors.
My larger worm bins kept in full shade, have faired well. Size of the bin is a big factor. Larger bins or containers will naturally have more volume to allow for greater insulation and protection from extreme temperatures. Smaller bins will “feel the heat” and not have as much buffer or room for protection. I keep old rugs on top of the bedding that are sprayed down daily to keep moist and cool. Add a few more inches of mulch to in ground worm beds and keep as moist as possible in these tough conditions. The mulch added to worm beds or flower beds will add organic matter, protection, and an additional moisture barrier.
RedWorm Composting: Thanks for your participation this past weekend.
25 JulThank you to all who came out to the San Antonio Botanical Garden this weekend. I have included some links and attachments to dig a little deeper into some of the topics we covered on Saturday.
Worm Handout pdf
Links:
• Care of worms– what to do when you get your worms.
• Harnessing the Earthworm – by Thomas J. Barrett
• Adding worms to your raised bed
• In ground bin
•Harvesting Worm Castings- My harvester
Thanks again to all who participated and to Sasha Kodet and the San Antonio Botanical Garden. Let me know if you have any questions, or if I can give you some feedback on your set up.
KyleHarrell@hotmail.com
210-310-5046
http://www.TexasRedWorms.com