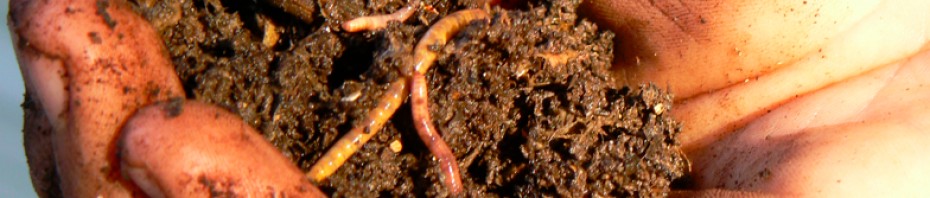
For large jobs of sifting worms from castings or compost I use my Texas Worm Harvester, but for smaller jobs I have built a small box sifter. With some scrap materials, and the left over 1/4 inch wire mesh I had I put together this sifter. I have also seen where other worm farmers use 1/8 inch screen, for my use I have found the 1/4 inch to do just fine. Separating worms from castings using this or the harvester method is the first step I take and removes most of the worms are course unprocessed organic matter. I do spend time picking out tiny worms and eggs, but losing a few is not a big deal. Here is a picture of a tiny hatchling that I found while harvesting castings. As you can see, or maybe not, these little guys are hard to find. This little thread of a worm was wiggling which made him easier to see.
Texas Worm Harvester (part 4)
10 MarAfter several weeks and hundreds of pounds, I have made a few modifications to my worm harvester. The first thing I did was replace the 1/2 inch hardware cloth w/ 1/4 inch screen throughout. The 1/4 inch screen keeps the majority of the worms out of the catch tubs and sends most worms to the end bucket along w/ the larger sized material. I still have to spend some time picking through the worm castings for eggs and baby worms. Using this method I have been able to speed up the process of separating worms from castings considerably.
Another change I made was adding a scrap piece of particle board to the front end to make loading easier and to prevent back flow. The only other modification was to tweak the angle slightly. I have the end pieces bolted so that I can adjust the height, also I can add blocks underneath to change the level.
Texas Worm Harvester (part 3)
8 FebThe sun was shining and the arctic blast of 2011 broke this weekend for the first run of the Texas Worm Harvester. I ran a couple hundred pounds of compost through the rig and had some good results. I had enough time to run a few of my red worm bins with the same success. I put together a fairly rough video of the project, and welcome any questions. Let me know if I can help you with your very own version.
Texas Worm Harvester (part 2)
5 FebJust about to have v.1.0 of the Texas Worm Harvester in operation. This one isn’t going to win any beauty contests or craftsmanship awards, but I think it’s going to get the job done. All the lumber I used was left over from previous projects, and I had to buy just a few bolts and nuts. I still have to finish attaching the hardware cloth, but thought I would share a couple of shots before it’s in production.
We are expecting a break in this “cold for Texas” snap and are planning on temps in the low 60’s tomorrow. My SuperBowl weekend plans are set, and harvesting some worm castings is at the top of the list.
Texas Worm Harvester
1 FebI have spent several months researching worm harvesters, and looking at designs. I began construction on mine yesterday. Thanks to Bruce at wormcompostingblog.com for sharing his plans on his drill powered model.
The most expensive materials I have purchased are two plastic tubs at $12.51 each, and rolls of 1/4″ and 1/2″ galvanized hardware cloth at $17.97 and $16.97 respectively.
I have some empty syrup tubs on hand from feeding cows that I used some tin snips to cut the bottom out of that will serve as the end pieces of the tumbler. I will wrap the hardware cloth around these.
I had a 3/4″ piece of galvanized pipe that will be my center axle. The struts are 2X4 pieces cut to fit the tubs, that will stabilize the turning of the axle. I pre-drilled and attached with a lag bolt. The other pieces of galvanized pipe and 90 degree elbows I had to purchase to make the crank.
Stay tuned to see how I built the housing and rest of the Texas Worm Harvester.