Archive | RedWorm Farming Tips RSS feed for this section

Worm Composting Bins and Garden Worm Tubes

31 Mar

Brian in San Antonio was kind enough to share some pictures of his worm tubes that he placed under the eves of his home and buried about 18″.  He drilled several holes in the  bottom 18″ buried portion of the pipe for drainage.

I just wanted to thank you for your help and encouragement starting worm composting. I went ahead and mixed 50-50 cow manure and peat moss in my tube and added a hand full of your red worms, and built a two bin system for the rest of the worms. two worm I added to my potted pineapple plant as an experiment. I figured I’d let the worms settle in for 3-7 days before adding vegetable mater. take a look at my pictures   and let me know what you think. thanks again brother. BRIAN

Here are some more pics of his two bin system.

Above: drainage bin to catch excess moisture from worm composting bin.

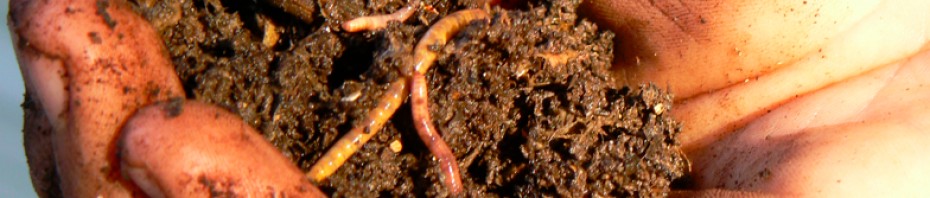
Thanks to Brian in San Antonio for sharing your pics and ideas.

Let us know if you have any questions about composting w/ worms.  Red Worms, European Nightcrawlers, and Alabama Jumpers available at TexasRedWorms.com for composting, gardening, and fishing. For more tips on what to do when you receive your worms check out our Care of Worms section.

Alabama Jumpers in Texas

28 Mar

I have been experimenting for a little over a year with the Alabama Jumper, sometimes referred to as the Georgia Jumper, or in this case Texas Jumper. The scientific name of which being Amynthas agrestis.  Now that that’s out of the way, this Jumper isn’t even originally from Alabama?   As a matter of fact, it is believed to hail from Asia.  How about that?  This aggressive and super strong worm can and will jump right out of your hand.  This super strength makes it a powerful tunneler, and allows it to burrow through some of the hardest packed clay soil.  This worm is a hot item, and is in high demand by gardeners everywhere for these reasons.  European nightcrawlers, African nightcrawlers, and Red Worms, are all great, but the Alabama Jumper can go to work in clay and sand unlike the other varieties.  I have experienced it’s power first hand, and been amazed at it’s strength and ability to work through some hard soil.  In San Antonio, we’ve got some pretty tough clay, and I have seen these Jumpers perform mightily in it.  I too have read all the hype about this worm, and it is the real deal.  The Alabama Jumper is great for people that want a worm to go to work in their soil, garden, or flowerbeds.  For composting, producing castings, or fishing I would recommend the others.

I have been trying various methods of raising the Alabama Jumper for over a year, and have had success with raising them in bins, as well as, worm beds or pits.  They are reproducing in both environments, and I have a limited amount available for sale.  Call for availability.

Make your own worm pit.

25 Mar

Due to a lack of morning or afternoon sun, I had a difficult time growing anything in this flower bed.  What began about three years ago as a compost pile would be converted into a worm pit.

First, I dug out some of the existing soil that was mostly clay and caliche (rock).  I dug out about 18″ and began filling w/ organic matter.  I began adding coffee grounds, horse and cow manure, grass clippings, leaves, and other vegetable waste.  I didn’t add worms until about this time last year.  Adding the worms at this point,  gave the organic matter plenty of time to break down, and provide a rich environment for the worms.  The worms have flourished and every handful yields a good many worms.  I have continued to add compost material, and water as needed to keep the bed moist.  Over the last month or so, the live oaks have given us a ton of leaves, and I have added them to the top layer as a mulch.   You can use newspaper, hay, or other kinds of mulch to keep the worm bed from drying out.  A layer of mulch will also keep the worms cool in the summer and warm in the winter.  This particular worm pit I am raising Alabama Jumpers, but is suitable for other species, red worms, European nightcrawlers, and African nightcrawlers.

Harvesting Worm Castings w/ a Homemade Sifter

23 Mar

For large jobs of sifting worms from castings or compost I use my Texas Worm Harvester, but for smaller jobs I have built a small box sifter.  With some scrap materials,  and the left over 1/4 inch wire mesh I had I put together this sifter.  I have also seen where other worm farmers use 1/8 inch screen, for my use I have found the 1/4 inch to do just fine.  Separating worms from castings using this or the harvester method is the first step I take and removes most of the worms are course unprocessed organic matter.  I do spend time picking out tiny worms and eggs, but losing a few is not a big deal.  Here is a picture of a tiny hatchling that I found while harvesting castings.  As you can see, or maybe not, these little guys are hard to find.  This little thread of a worm was wiggling which made him easier to see.

Outdoor worm bed question?

8 Mar

Thanks to Chris from Arkansas who sent in a great video question via email.

My response:

Looks like a great spot to build a worm bed. (Pick a shaded area that can be kept moist, well drained, with decaying organic matter.)

You can do either:
If you bury your plastic bin, be sure the bottom of the tub is either removed or has lots of good sized drainage holes.  You could also dump the contents of your plastic bin into the flower bed.  For added protection from drying out, and critters you can cover with a few layers of damp newspaper, cardboard, straw, mulch, old carpet, or plywood.
Or you can do both:
Bury your red wiggler bin.  Use the rest of the space for European nightcrawlers (Eisenia hortensis), or other species.  By building up organic matter you can attract your native earthworms and/or supplement with some purchased worms.   You can keep tabs on your red worm population, and watch the locals come to feed.  I have done this in a couple of flower beds, and it seems to work well.  The red worms will not stray and stay close to the food source.  The earthworms (European nightcrawlers) tend to spread out more which is great for surrounding soil.  Keeping your bed moist and full of organic matter will attract them and keep a fair amount close to home.
Hope that helps.
Red Worms– (Eisenia foetida) top feeders, composting worms, extremely prolific.
European Nightcrawlers– (Eisenia hortensis) deeper feeders, great for aerating lawn and garden, can also be used for composting.
Both Red worms and European nightcrawlers can be used to reduce household waste, accelerate the composting process, as well as, add nutrient rich natural fertilizer to plants, grass, and garden.

European Nightcrawlers now available

23 Feb

European Nightcrawlers are now available at TexasRedWorms.com. They can be used for composting just like the red worm, but are a bit larger, stronger and are deeper tunnelers than the top feeding red worm.  Red Worms prefer piles of moist decaying organic matter (leaves, manure).

There are many different species of earthworm ranging in size and climate, most can be classified in one of two larger camps. The first being the deeper dwelling tunnelers (European Nightcrawler), and secondly the top feeding composters (Red Worm).  A lot of biologists claim that all earthworms have been introduced, from settlers bringing them in potted plants and so forth.  I have a hard time with that, but guess it could be possible.

Care for both worms is similar and they can even co-habitate. The nightcrawlers are able to be added directly to your garden, flowerbed, or lawn, while the red worms would not fare so well.  The red wigglers are more prolific smaller worm that will not scatter like the European nightcrawler, or Alabama Jumper.  Both are well suited for composting and bin raising, and care is identical.

European nightcrawlers are typically what you will find at bait shops, and grow thicker and longer than the red wiggler.  Both are active on a hook and will get the fish to bite.

Cold Hardiness of Worms

21 Feb

WIth temperatures dipping into the mid-20’s and a wind chill well below, I transported several pounds of red worms and european nightcrawlers in the back of a pick up from San Antonio through Houston to southeast Texas.  I knew it was going to get cold, but the forecast for San Antonio was way off.  When planning our trip, the most recent weather reports called for morning temperatures in the mid-50’s.  Thank God for the cold hardiness of these worms.  We finally reached our destination and the 6 hours the worms spent in small bins exposed to these temperatures I feared I would have lost many of the worms.  Temps. in bins dipped well below freezing.

Fortunately, both species (europeans and red wigglers) recovered just fine.  Even the smaller juvenile worms were actively working the next day, as I checked the bins and got them to 50F.

God bless these little guys who prove over and over their resilience in some less than ideal conditions.  I don’t recommend testing the limits, as I typically keep them fairly protected (indoors when possible, the garage, and worm beds several inches underground).

Keys to worm farming success.

14 Feb

A proper set up, and a little planning is all you need to be a successful worm farmer.  In no time you’ll be making more bins, and harvesting valuable castings for your soil and plants from garbage that your family produces.  Red worms are rapid breeders, and can lay an egg every 7 days.  Because they breed so fast in good conditions, focus on their environment, and you will have more worms than you know what to do with.  I started 4 years ago with a medium sized drink cup worth of worms that wasn’t even full.  I sputtered for a bit until I dialed in the right conditions for their bin.  Soon after I got it right and 1 bin became 2 and there is no telling how many worm beds and bins I have started.  So how many worms you start with is not important, but how you start is critical for success.

On another note, I harvested the castings from one of my starter (shoebox size) farms this weekend that I started on 11/28/10 with 10 eggs.  This experiment proved that a healthy bin will produce great results.

For first time worm farmers I recommend my starter farm $40 that will give you a headstart on producing castings and more worms than just purchasing a pound of worms. An established environment with reproducing worms from egg to adult, and will out produce a worm purchase alone.  Worm farming is easy, but you must get a few things right.  The right kind and amount of food, the right temperature, the right moisture, and the right amount of room.  BIns should mimic their natural environment, a cool, dark, moist space with decaying organic matter.

The TexasRedWorms.com starter farm in most cases,will need to be split in about a month.  Splitting bins when they grow out of their current one is important, because when conditions are right the only limit to the worms reproduction is space and available food.

I recommend keeping the starter bin as a breeding bin, and starting new bins from your harvest.  When you have a bin that is producing, you can then experiment with other set ups (larger bins, worm beds, pits, trenches, worm towers,and more) .

Have fun, and Happy Valentine’s Day.

Planting Blueberries w/ worm castings

19 Jan

I just received my blueberry shipment yesterday, and was anxious to plant.  I ordered 14 blueberry 2-3 foot tall plants (climax, premier, brightwell, and delight varieties).   Blueberries like a little acidity and do very well in the southeast Texas well drained sandy soil.  We will put most of the plants in the ground in Livingston, but  I wanted to have a couple here in San Antonio in pots.

My blueberry potting mix: Sandy southeast Texas soil, peat moss, worm castings, and finished compost.

For the two plants I split 4 lbs of Texas red worm castings that I placed near the roots, not mixed like the other components.  Worm castings are an outstanding fertilizer to support root growth and development.

These plants should produce a few berries early this Summer, but we will pick them early to yeild a better crop in the second year.

I chose a large container, and repurposed an empty syrup tub that we use to feed cows.

Best Meyer Lemons yet w/ Worm Castings

8 Jan

Better yields, better tasting fruits and vegetables are the result when you fertilize w/ red worm castings. Worm castings contain loads of calcium, phosphorus, nitrogen, and potassium.  Other micro and macro nutrients are present that support and develop superior root structure, to plants fertilized w/ commercial fertilizer.  Even though highly concentrated, worm castings will never burn plants like synthetic fertilizers can.  Benefits of fertilizing with worm castings include healthier plants, healthier fruits and vegetables, and cost savings.